If you live with a dog or cat, you’ve probably noticed how quickly their toys take over your living room—squeaky bones under the couch, plush mice in the hallway, and a random tennis ball that somehow always ends up in your shoe. Instead of hiding the chaos behind a closet door, why not turn it into something beautiful and functional? A DIY pet toy storage box is more than just a tidy-up solution—it’s a design statement that celebrates your pet’s personality while keeping your home organized.
🧺 Why Make Your Own Pet Toy Box?
Most store-bought toy bins are either dull plastic containers or too small to handle your pet’s growing collection. A handmade storage box lets you control every detail—size, color, materials, and even the message it conveys. Plus, it’s a sustainable way to reuse materials you already have, like old wooden crates, cardboard boxes, or fabric baskets.
DIY isn’t just about saving money—it’s about infusing love, creativity, and style into your home.
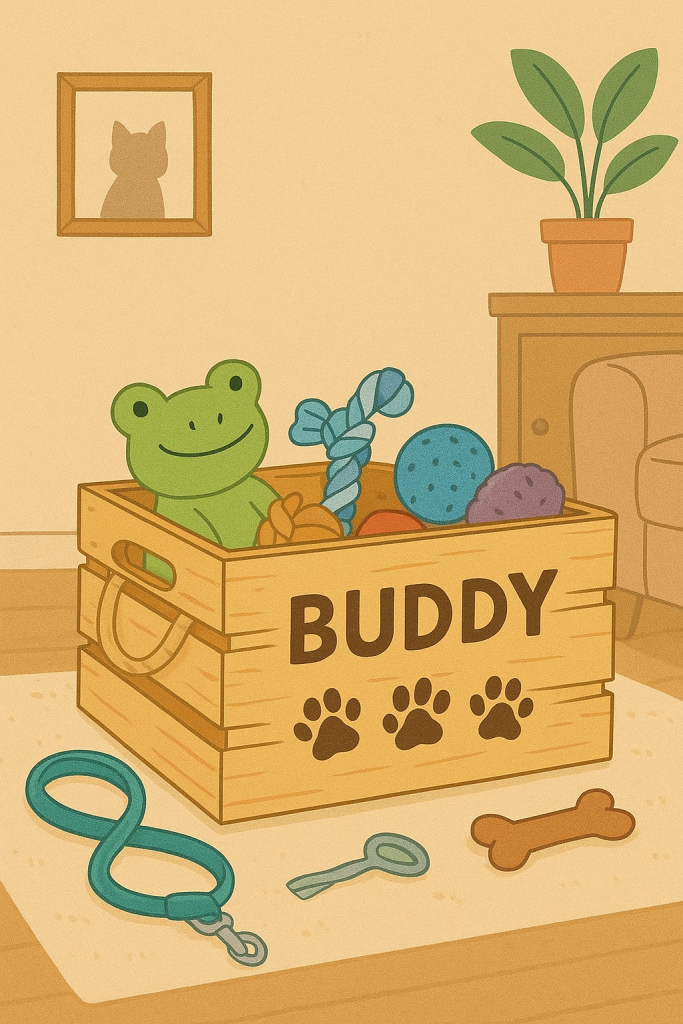
🪵 1. The Wooden Crate Makeover
Start with a simple wooden crate (from fruit, wine, or old shipping boxes).
- Step 1: Sand the surface to smooth rough edges.
- Step 2: Paint or stain it to match your home’s color scheme.
- Step 3: Add your pet’s name using stencils or hand-painting.
- Upgrade: Attach small caster wheels for easy rolling around the house.
Style tip: Choose pastel or neutral tones for a minimalist look, or go bold with paw prints and bright colors for a playful vibe.
🧵 2. Fabric Basket Chic
For those who love softer textures, upcycle an old canvas bag or leftover fabric.
- Sew or glue the fabric around a cardboard base for structure.
- Add handles using old belts or thick rope.
- Line the inside with washable cloth for easy cleaning.
Why it’s great: Lightweight, collapsible, and pet-safe—perfect for smaller spaces.
📦 3. Recycled Cardboard Drawer System
If you want a zero-cost project, cardboard is your best friend.
- Stack multiple boxes of different sizes to create compartments—one for chew toys, one for balls, one for grooming tools.
- Cover each section with wrapping paper or old magazines for a stylish, recycled finish.
Bonus: Label each drawer with cute icons so you can find toys quickly.
🪡 4. Personalized Touches
The beauty of DIY lies in details. Consider:
- Adding a chalkboard label for notes like “Wash toys soon!”
- Decorating with recycled buttons, fabric patches, or tiny frames featuring your pet’s photo.
- Using scented sachets of lavender or rosemary to keep the box fresh naturally.
🌿 5. Function Meets Aesthetic
A DIY pet toy box isn’t just about storage—it’s a visual bridge between your pet’s world and yours. When thoughtfully designed, it blends seamlessly into your living room décor, turning pet clutter into curated charm. Some pet parents even design boxes that double as benches or end tables—form, meet function.
🐾 The Bigger Picture
Behind this small project lies a bigger shift: the move toward sustainable, intentional pet ownership. By crafting instead of consuming, you’re teaching care through creativity. Your pet gets a tidy play space, you get a stylish home, and the planet gets one less plastic bin in the landfill.
Because sometimes, tidying up isn’t about hiding mess—it’s about celebrating the joyful chaos pets bring into our lives, in style.